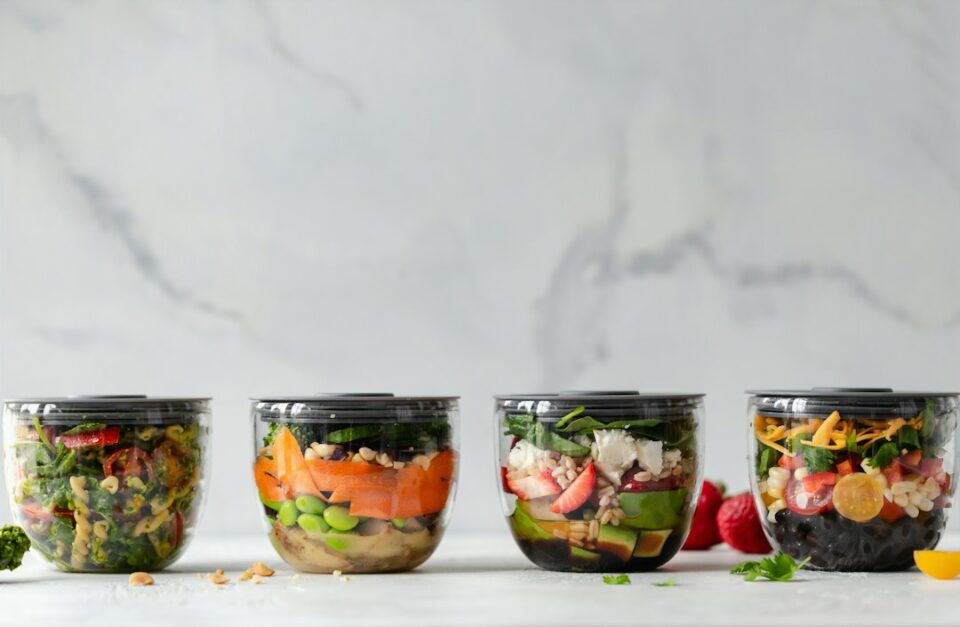
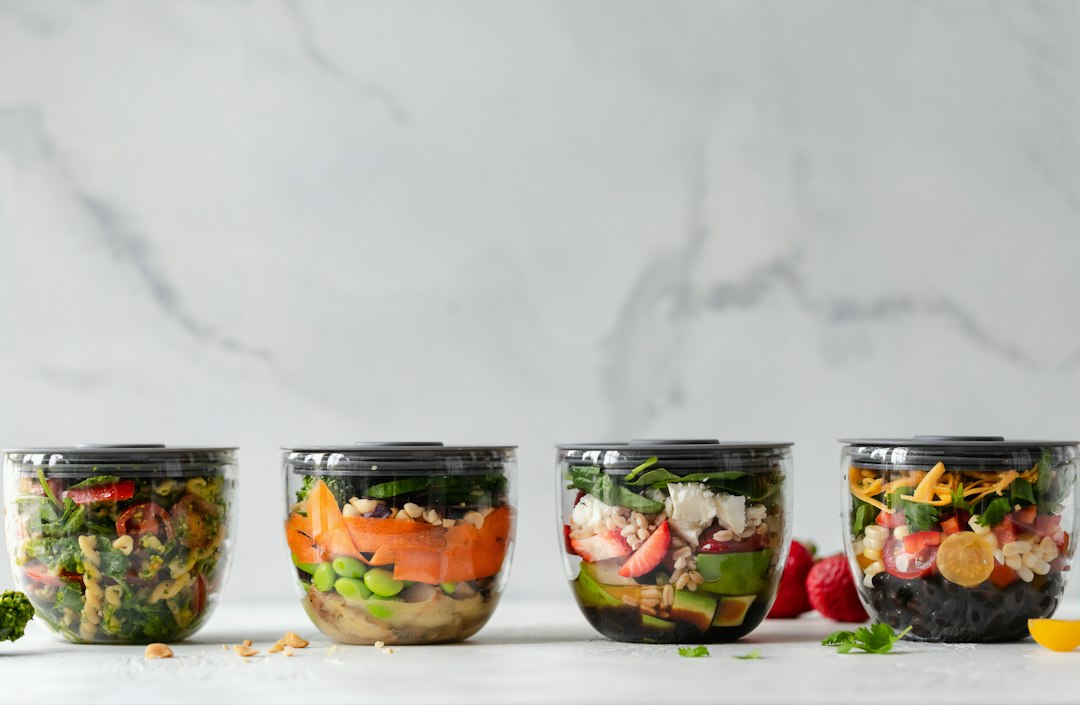
Meal Prep Containers can turn a chaotic week of last-minute meals into calm, predictable lunches and dinners. The right set keeps sauces where they belong, protects textures you worked hard to build, and makes portions easy to see and grab. This field-tested guide explains how to choose materials, sizes, lids, and layouts; how to pack and reheat with less mess; and how to keep everything organized so you use what you prep. For more practical kitchen routines and recipe ideas, you can visit Life With C anytime.
Why your containers quietly shape what and how you cook
Most of us choose containers almost on autopilot, and then wonder why meal prep feels awkward a month later. The container you pick nudges your cooking in subtle ways. If all your boxes are shallow rectangles, you’ll lean toward casseroles, baked pastas, and roasted sheet-pan meals. If most are tall rounds with strong seals, soups, stews, and brothy noodles become your default. Clear walls invite variety because you can see what needs to be eaten; opaque walls encourage labeling discipline but may hide leftovers behind newer items. Even lid design changes your habits: a gasketed latch might make you comfortable packing curry, while a press-on lid may steer you toward drier foods.
There is also a rhythm effect. When a set nests neatly in a cabinet and stacks precisely in the fridge, you can prep multiple dishes without fighting storage space. When lids go on easily and don’t warp, you handle them without thinking. Every bit of friction you remove invites you to prep one more container’s worth of food. Over time, those small nudges decide whether you bring lunch most days or buy it because packing feels like a chore.
Finally, good containers protect the cooking you already did. A sturdy seal keeps vinaigrette from soaking your greens before lunchtime. A vented lid reduces sputtering during reheating. Properly sized boxes minimize unused headspace so meals don’t dry out or pick up fridge odors. Choose well once, and you’ll cook more confidently with fewer surprises.
Meal Prep Containers: a quick decision map
If you want a fast way to match your real life to the right kit, use this three-step map. It will help you narrow thousands of options to a small, reliable set.
- Step 1: Where will you eat? If you commute and reheat at work, favor glass bases for at-desk microwave reheats or high-quality microwave-safe plastic to keep weight down. If you reheat in an oven at home, glass and some stainless-steel bases (without plastic lids in the oven) shine. If you rarely reheat, lightweight plastic or stainless steel will be comfortable to carry.
- Step 2: What do you pack most? Soups and sauces → leak-resistant, gasketed lids and round cups. Grain bowls and mixed plates → 3–4 cup rectangles. Salads → one large compartment plus a small sauce cup. Snacks → 1-cup minis with secure lids. If you bake trays of lasagna or enchiladas, add a couple of shallow glass rectangles.
- Step 3: How organized is your space? If you share a fridge or pack for several people, choose uniform footprints that grid up neatly, and sets that use the same lid size across multiple bases. If you have little cabinet space, favor nesting bases and fold-flat silicone bags for the freezer.
Once you answer those questions, build a core kit: two 3–4 cup lunch boxes, two 2-cup sides, one 16–20 oz soup cup, and two tiny sauce cups. Use this week, notice the gaps, then fill in with specialized shapes you actually need.
Materials in practice: glass, plastic, stainless steel, and silicone
Every material is a set of trade-offs. There is no universal winner; there is only what fits your meals, your commute, and your appliances.
Glass is stable, clear, and forgiving in the oven. Borosilicate or tempered glass resists temperature swings better than ordinary glass. It doesn’t hold stains or strong smells easily and wipes clean even after tomato sauces or turmeric-heavy curries. Downsides: weight and fragility. Glass is heavier in a backpack and can chip if mishandled. Practical habits help: remove lids before reheating, support hot glass on a dry trivet (not a wet stone counter), and don’t go from a hot oven to a very cold surface. For home lunches and reheats, glass is often the most pleasant day-to-day experience.
Plastic earns its place with light weight, cost, and toughness. High-quality BPA-free containers can last years when used within their temperature ratings. They excel for fruit, snacks, sandwiches, and short-term fridge storage. When microwaving in plastic, use the vent (if available), reheat in shorter bursts, and stir to even out hot spots. Over time, plastic can scratch and pick up aromas; reserve older, scratched pieces for dry goods or pantry snacks and keep your newest plastic pieces for lunches you carry. Avoid the oven; that’s where glass or steel belongs.
Stainless steel is light relative to glass, sturdy, and resistant to stains and odors. It’s excellent for salads you toss in the container and for freezer storage of cooked grains or proteins. Some steel bases are oven-safe, but many steel sets use silicone or plastic lids that are not; check specifics. The main compromise is opacity—you won’t see inside—so label clearly. If you prefer less plastic contact with hot food, a steel base with a silicone or metal lid is a solid option, and the lightness helps when you walk or bike to work.
Silicone shows up as lids, pouches, and collapsible bowls. Good silicone lids seal tightly on compatible bases. Reusable silicone freezer bags replace many single-use zipper bags and can stand or lay flat to freeze sauces and broths. Silicone can absorb strong aromas with time; baking-soda soaks and thorough drying help. Many silicone items are microwave-safe; check temperature ratings and set containers on a sturdy plate if the base is wobbly when full.
For most households, a mix works best: glass bases for reheats and oven use, steel for rugged carry and salads, plastic for snacks and light lunches, and silicone bags for freezer portions. If you cook and store a lot of tomato or curry dishes, lean toward glass and steel for the pieces that see those foods most often.
Shapes, sizes, and compartments that match real meals
Right-sizing is the difference between a satisfying meal and a container with too much air. Aim for volumes that fit the food you make most often.
- 1 cup (240 ml): Snacks like nuts, cut fruit, yogurt, or a portion of hummus; sauce cups for dressings and toppings.
- 2 cups (475 ml): Lighter lunches (grain base, chopped vegetables, small protein), pasta sides, overnight oats, or breakfast parfaits.
- 3–4 cups (710–950 ml): Full meals with a main and sides, grain bowls you want to stir as you eat, or a generous salad.
- 16–20 oz rounds: Soups, stews, ramen, and congee; the round shape helps circulate heat during reheating.
Shape matters, too. Shallow rectangles store baked dishes and roasted vegetables efficiently and reheat evenly in ovens. Tall rounds are ideal for liquids and layered leftovers. Divided or bento-style bases keep crunchy and soft items apart until the moment you eat. For grain bowls, many cooks like a three-compartment layout: one larger zone for grains, two smaller for protein and vegetables. For salads, one big compartment plus a separate sauce cup avoids damp greens.
Batch-cooking staples benefits from multiple medium containers instead of a single huge one. Portion a pot of rice into three 2-cup containers; they cool faster, you rewarm only what you need, and the rest stays fresher. The same logic works for shredded chicken, roasted squash, or beans. For freezer storage, leave headspace in liquids and press parchment or plastic wrap onto the surface of sauces to reduce exposure to air.
Lids, seals, vents, and leak resistance
People often focus on bases and forget that lids do half the work. Design and condition matter. Here’s what to look for and how to keep performance steady over time.
- Snap-lock lids with removable gaskets are your best friends for liquids and saucy foods. A removable silicone ring lets you scrub away residue that slowly builds in grooves. When that ring is clean and seated flat, leaks are far less likely.
- Press-on lids work for dry foods and fridge storage that won’t get jostled. Use them for salads you won’t tip, brownies, or cold pasta salad at home. Don’t rely on them for backpacks or bike rides.
- Twist caps on jars and soup cups can be very secure. Align threads carefully and avoid cross-threading, which can compromise the seal. If you use them for hot liquids, leave the cap slightly loose during reheating so steam can escape.
- Vented microwave lids save you from splatters and help steam escape. Open the vent before reheating; close it for transport once the food is cool.
A simple water test tells you what a new container can handle: fill with water, close the lid, tip over the sink for ten seconds, and look for drips. Some moisture around a vent is normal; steady drips mean the container is better for solid foods. After washing, let gaskets and lids dry fully before reassembly so moisture and smells don’t get trapped. If latches get sloppy over time, look for replacement lids or gasket rings from the manufacturer; swapping a tired lid for a new one often brings a favorite base back to life.
Heat, cold, and cleaning: make appliances work for you
Read the insert that comes with your containers; ratings vary by brand and model. That said, practical kitchen habits make most sets easier to live with.
- Microwave: Vent the lid, use medium power in shorter bursts, and stir midway. This reduces hot spots and spares plastic from the harshest heat. For grain bowls, sprinkle a teaspoon of water or broth before reheating to loosen textures. For sauces, cover with a paper towel to reduce splatters.
- Oven: Glass bases without lids handle reheating and even some baking tasks; check rated temperatures. Avoid putting plastic lids or silicone rings in a conventional oven unless explicitly rated for it. When moving hot glass, use dry mitts and set the dish on a dry rack or trivet.
- Freezer: Leave expansion headspace in liquids. Use flat, shallow containers or silicone bags to freeze sauces and stocks; they thaw faster and stack neatly. Label with the dish and date, and rotate older items forward.
- Dishwasher: Top-rack placement is gentler for plastic lids and gaskets. High-heat dry cycles can warp thin pieces over time; if you notice warping, switch to a gentler cycle or hand wash lids.
Hand-washing grooves and gasket channels with a small brush keeps seals reliable. For glass and steel bases, normal dishwasher cycles are typically fine. If a piece cracks, warps, or a lid no longer seats correctly, retire or demote it. Your future lunches will thank you.
Food quality and storage life: keep meals appetizing
Containers can’t make tired food taste new, but they can protect the textures and aromas you created at the stove. The key is fast, clean transfer; thoughtful separation; and the right reheating method later.
- Cool and portion quickly: Divide big pots into shallow containers so heat dissipates efficiently in the fridge. This helps textures remain closer to the moment you finished cooking.
- Separate wet and dry: Keep dressings and crunchy toppings apart until you eat. Pack croutons, nuts, crisp tofu, or roasted chickpeas separately so they don’t soften.
- Oil lightly: Toss grains or pasta with a small amount of oil or sauce before chilling so they don’t clump. For roasted vegetables, store in a shallow base so they don’t steam; re-crisp in the oven or an air fryer.
- Headspace matters: Try to match container size to the portion so there isn’t a large pocket of air. Less empty space typically means less drying and fewer off smells.
- Label clearly: Painter’s tape and a marker are perfect. Write the dish and date. If space allows, add reheating notes like “vent lid, 2×60 seconds, stir.”
Visibility influences use. Clear bases and lids help you see what’s ready to eat without opening everything. If you use opaque steel, put labels on the face that will be visible in your fridge “lunch zone” so you can quickly pick the oldest item first.
Organization systems that reduce friction
Meal prep works best when your containers are easy to find and easier to put away. Build a cabinet and fridge system that asks as little of you as possible on busy mornings.
- Nesting bases, stacked lids: Choose sets whose bases nest inside each other and whose lids stack flat. A simple file rack can hold lids upright by size.
- Uniform footprints: Containers that share a footprint stack neatly in the fridge. You can form a clear grid: lunch boxes on one shelf, sides on another, sauces in a small bin.
- Zones by purpose: Create a “ready-to-eat” shelf and an “ingredients” shelf. That split tells you whether you’re grabbing lunch or building one.
- Color-coding: Assign one lid color to each person or to a category (work lunches, kids’ boxes, leftovers). Color makes the right container the obvious container.
- Prep runway: On your main cooking day, clear a landing zone in the fridge for several shallow containers to cool. Rearrange shelves before you cook so you don’t juggle hot dishes later.
If your cabinet is deep, keep sets in a small bin you can pull forward like a drawer. In the fridge, face labels outward and stack by day, oldest in front. All of this lowers the effort to use what you’ve cooked, which is the entire point of meal prep.
Budget, sustainability, and replacement parts
You don’t need a perfect set to get perfect use. Start small, buy for your meals, and keep pieces working longer with simple upkeep.
- Start with a core kit: Two 3–4 cup boxes, two 2-cup sides, one soup cup, and a couple of sauce cups cover most packed meals. Add specialized shapes only after a few weeks of real use.
- Mix materials: Glass for reheats and oven tasks; stainless steel for light, rugged carry; BPA-free plastic for inexpensive, lightweight storage; silicone bags for freezer portions of sauces, beans, and stocks.
- Replace parts, not sets: Many brands sell spare lids and gasket rings. Swapping a warped lid extends the life of a glass or steel base for years.
- Repurpose and demote: Retire scratched plastic to dry pantry duty (rice, crackers, tea bags). Use slightly stained but sound pieces for marinating or for foods with strong color.
- Reduce disposables: Silicone freezer bags and sturdy containers cut down on single-use wraps. Freezer-friendly containers let you batch-cook and rely less on takeout.
The best sustainability move is high utilization. A modest kit used daily beats a fancy set that sits idle. Buy pieces that match your routine, then keep them working with occasional part replacements.
Packing playbook: salads, bowls, soups, pasta, snacks
Use these patterns to pack faster and eat with better texture, whether you love greens, grains, or hearty stews.
Salads
- Dry greens thoroughly; excess moisture collapses delicate leaves. A quick spin in a salad spinner makes a real difference.
- Layer sturdy items (beans, cucumbers, carrots) at the bottom, then greens, then delicate toppings (nuts, cheese, herbs). Keep dressing in a separate mini cup until you eat.
- For lunch boxes you’ll shake to mix, leave a little headroom. If you plan to eat from the container, a 3–4 cup rectangle provides space to toss.
Grain bowls
- Fluff grains while warm so they cool into loose, friendly textures. A splash of dressing or olive oil keeps them from clumping.
- Pack roasted vegetables and proteins in separate pockets or compartments so you can reheat them without wilting greens.
- Drizzle sauce at the last minute or use a small sauce cup so each bite tastes bright rather than soggy.
Soups and stews
- Use round, gasketed containers with headspace for expansion if freezing.
- For microwave reheats, vent the lid and stir halfway through. Place a paper towel over the top to catch condensed splatter.
- Freeze extra portions flat in silicone bags; they thaw quickly under cold running water, then move to a saucepan or microwave-safe bowl to heat.
Pasta and sauce
- Toss pasta with a bit of sauce and oil before chilling. This protects texture and speeds reheating.
- Freeze sauces in shallow containers or silicone bags. Thin with a splash of pasta water or broth when reheating to restore silkiness.
- Store grated hard cheese separately in a tiny cup to keep it fluffy.
Snacks and breakfast
- Use 1-cup minis for nuts, sliced fruit, or granola. They stack in office drawers and kids’ lunch bags.
- For overnight oats or chia pudding, 2-cup rounds fit fruit on top with room to stir.
- Keep a small utensil kit (fork/spoon/chopsticks/napkin) near your lunch zone so you don’t forget tools.
Troubleshooting leaks, warping, odors, and stains
Problems happen even with good gear. These fixes and workarounds keep your set rolling.
- Leaks: Check that gasket rings sit flat and clean. Food bits in grooves compromise the seal. If the latch still feels loose, replace the lid or gasket. For brothy meals in backpacks, choose twist-cap soup cups and keep them upright.
- Warping: This often comes from high heat in dishwashers or setting hot bases on cool surfaces. Hand-wash lids or use gentler cycles. Demote warped bases to pantry duty where precision sealing matters less.
- Odors: Disassemble gaskets and soak lids and rings in warm water with baking soda. Sunlight helps deodorize clear pieces; set them near a window for an afternoon.
- Stains: Lightly oil plastic interiors before packing tomato- or turmeric-rich dishes. If staining happens, it’s cosmetic; function usually stays fine. For glass, a vinegar soak removes hard-water haze.
- Stuck-on residue: Warm soapy water and a soft brush for latch channels and gasket grooves. Avoid abrasive pads on plastic; they create micro-scratches that invite future buildup.
When a favorite base seems beyond saving, look for replacement parts. Many brands offer lids, rings, and even latch components, which is cheaper and friendlier to the planet than a full replacement.
Cleaning routines and simple safety habits
A small routine you repeat beats a complex one you skip. These habits keep containers ready for the next round of cooking and make weekday lunches simpler.
- End-of-week reset: The day before your big cook, gather empties, remove gaskets, and wash everything. Dry fully before reassembly to avoid trapped moisture and lingering smells.
- Brush and basket: Keep a small brush for gasket grooves and a dishwasher basket for tiny lids and sauce cups so they don’t tumble to the bottom rack.
- Monthly check: Scan for cracks, warped lids, and tired gaskets. Replace a few small parts rather than waiting for multiple failures on a Sunday night.
- Heat sense: Don’t move a hot glass base onto a cold stone or into a very cold fridge. Let it cool on the counter or a rack first. Open vents during microwave reheats so steam doesn’t pressure-lift lids.
- Label discipline: Date everything. Store new items behind older ones so you naturally reach for meals that have been waiting longer.
Match your container system to your cooking rhythm. If you batch cook on Sundays, prioritize shallow glass rectangles and a few sturdy lunch boxes. If you cook extra on weeknights, keep mid-sized boxes and sauce cups front-and-center to quickly capture leftovers. A tidy, maintained set silently supports home cooking and gives you back minutes and attention when you need them most.
Putting it together: your container system, your cooking style
Great meal prep isn’t about buying the most expensive set; it’s about the quiet comfort of a system that matches your meals and your schedule. Choose materials that fit how you reheat and carry food. Select sizes that suit what you actually eat. Favor lids and seals that handle your messiest dishes and keep them in good shape with simple cleaning routines. Organize your cabinet and fridge so grabbing lunch is as quick as opening the door. That’s how Meal Prep Containers stop being a drawer of mismatched lids and start acting like reliable kitchen partners you use every week.